News
18 May 2022
Mixing Tips From Clubs To Stadiums

Subscribe to CX E-News
One of the most difficult parts of working as a touring front of house engineer is maintaining a consistent sound from show to show. This can be especially difficult when working with different performers or traveling to new venues each night. That’s why it’s crucial to make sure you’re prepared for any situation. This article details a variety of useful tips for dialling in a clear, balanced mix in any setting, from rehearsals and local club shows to worldwide arena tours.
Pre-Show Setup
Capture a Multi-Track Recording of the Performance
Most front of house consoles offer some form of multi-track recording or DAW playback, which can be a powerful tool for streamlining your workflow. With a multi-track recording of a previous performance or rehearsal, you can create a show file template for future performances, which makes it easier to:
• Save time setting up on the day of the show
• Perform a basic sound check without the band being present
• Maintain consistent sound quality from venue to venue
• Identify technical issues before they become problems
• Create sub-mixes like mix-minus, broadcast, or mix-plus-click
After capturing your recording, it’s time to create your show file and start building your mix.
Route Each Input To a Sub-Group
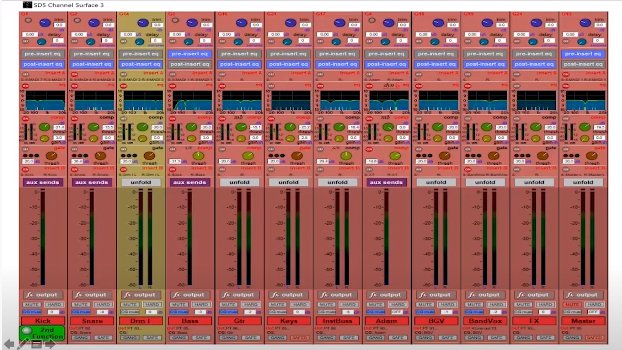
A well-organized routing scheme is essential for any great mix. Whether you’re attending rehearsals, mixing a band at a local club, or following a touring act on a 50-date arena run, using the same approach to routing and bussing every time is key. Not only does this make it easier to mix multiple performers each night, but it also helps speed up your workflow as you develop muscle memory for common tasks.
For maximum control, route each input into a sub-group, then route each sub-group to the main mix bus. While the individual inputs will vary from performance to performance, the routing and bussing structure should remain as follows:
• Route kick and snare inputs to their own individual busses, then to an “All Drums” bus
• Route all bass, guitar and keyboard inputs to separate stereo busses, then to an “All Instruments” bus
• Route the lead and background vocals to their own busses, then to an “All Vocals” bus
Not only does this approach help you navigate the console more quickly, but it also makes it easier to rely on your console meters. By familiarizing yourself with this setup before the show, you can easily identify technical problems by pinpointing where the signal flow is wrong. For instance, if you can see an input signal on the kick drum input, but not on the drum bus, you can safely assume that there is an issue with the patching or routing of the kick drum channel.
Additionally, using sub-groups enables you to quickly create sub-mixes for a wide range of applications, including broadcast and monitor feeds. This makes it easy to accommodate requests from different teams during setup and to capture recordings. If you’re working on a console that doesn’t feature grouping functionality, use auxiliary sends to create sub-mixes. Simply set an aux send to post-fader and turn the gain up to unity on each channel you want to hear in the sub-mix.
Create a Rough Mix Before Soundcheck
It’s always a good idea to create a rough mix of your show before soundcheck. You can do this during a live rehearsal, or using a multi-track recording of a previous performance.
A good rough mix makes it easy to dial in the right balance in festival settings, where you’re often not able to perform a soundcheck. Although you may not be able to preview your mix through the PA, you can use your meters, headphones, and even near field studio monitors to make sure the main elements of the mix are present. For instance, if you know that your mixes are set up to see kick and snare touching +3 on your master meter, then you can use this as a great benchmark to position everything else around them since they are a dynamically constant reference point.
While the sound in the room may change from venue to venue, as long as your mix remains the same, you can quickly identify environmental problems with acoustics and reverberation. Instead of trying to tweak your mix to suit the sound of the room, focus on using EQ to correct any problems that the room or PA system is causing.
Use Serial Compression
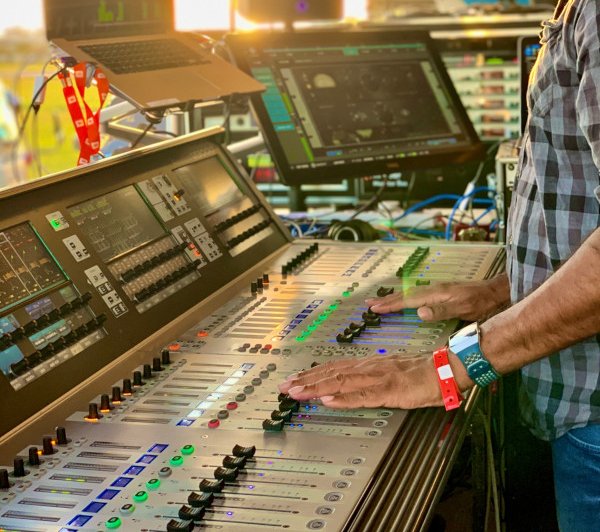
One reason why mastered studio recordings sound so good is because the tracks are all compressed in a uniform way. While dynamic mixes may sound great in some settings, they tend to lack energy and excitement, especially at low levels or in reverberant venues. Low frequencies, in particular, tend to become exacerbated when uncompressed, causing unflattering bass build-ups.
By using serial compression on each instrument individually and again at the bus level, you can tame the dynamics of the mix and prevent too much low-frequency energy from overwhelming the venue. For a controlled mix that hits hard in any setting, use fast release times to help transients pop through the mix and grab people’s attention without eating up too much headroom.
If the performers are using a click track, time the release of the compressor to the BPM of the song for a tight, punchy sound. For most songs, it’s best to time the release to the beat of the quarter note or eighth note. Well-timed release settings also help prevent unwanted echo and reverberation in large venues.
Use Effects While Mixing
Taking the time to program a detailed show file will allow you to make effects choices that amplify the emotion of a mix – essentially, no one is ever mixing totally dry. Remember to get correct BPMs and keys for each song. And, always have your effects routing ready in case your artist wants to hear something quickly.
However, it can be tricky to deal with different-timed reflections bouncing around, especially in an arena setting. One powerful trick for controlling reflections is to adjust the pre-delay of your reverb so that the reflections are in time with the BPM of the song, similar to the approach for setting compressor release times outlined above.
Monitor at Low Levels While Building Your Rough Mix
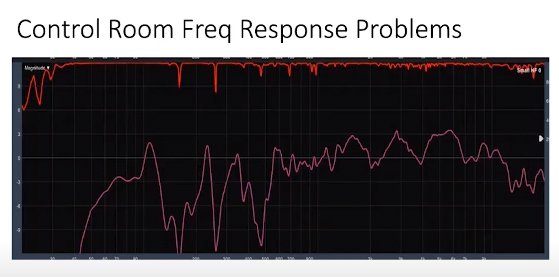
Getting your mix to sound good in a studio or rehearsal room can be tricky, but making sure it translates to every venue on the tour is a completely different challenge. Generally speaking, there are two ways to build your mix before the first performance.
In most cases, you’ll be using near field monitors in your studio or practice space to dial in the mix during rehearsals. This can be tricky, as your room has a large impact on your sound, making it difficult to identify the source of a problem. For instance, it can be difficult to know if your kick drum sounds muddy, or if there is a low-frequency build-up in your room. However, it’s important to note that the venues you’ll be mixing in will also have their own acoustical imperfections.
Thankfully, there are ways to prevent these issues.
• To ensure your mix sounds good in any setting, check that you can clearly hear all of the main elements while monitoring at low volumes. When played at low volumes, near field monitors aren’t loud enough to excite the room, providing relatively flat frequency response and making it easier to trust the accuracy of what you’re hearing.
• It’s also a good idea to record your mix and listen back on your phone, laptop speakers and headphones to ensure it translates well to other systems as well. Remember, a well-mixed recording should sound good in any setting.
• On arena tours, performers often carry their own PA system to each venue. In this case, you can create a rough mix on the actual system you’ll be using on the tour. This is by far the best way to ensure your mix will translate, as the only variable will be the venue. Just remember that the room will still have a big impact on the frequency response on the PA.
Create a Target Trace
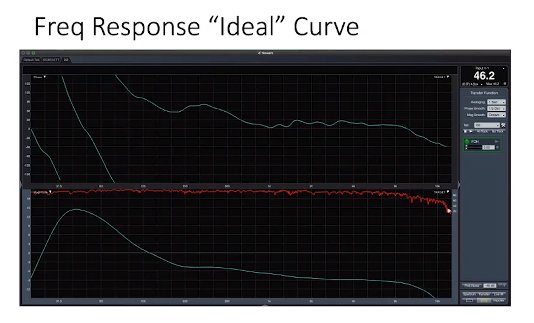
In order to ensure your mixes are accurately translating to a live environment, you have to know what you want them to sound like in the first place. That’s why it’s crucial to use analysis software like SMAART to create a target trace, which maps out the ideal frequency response for your PA when playing back your mix.
This can be a powerful tool when trying to eliminate variables in a new venue—especially if you can create this trace using the same PA you’re bringing on tour. However, you can still use the SMAART software to create a target trace without a PA and refine the curve over time as you visit more venues.
At the Venue
Check Out the Venue Before the Show
If you’re lucky enough to be in town the night before your show to see who’s playing and get on their guest list, meet the engineer and hear their mix in the room. We do that all the time. And it’s more collaborative that way.
For instance, if you’re able to identify that the room has an abundance of low-end, tweaking your EQ during soundcheck will be easier because you know what you’re fighting against. When in doubt, remember to trust your instincts and your show file.
It’s also a good idea to walk on stage and get a feel for what the performers are hearing. This makes it easier to understand what they need when requesting changes to their monitor mixes. Even though the mix may sound crystal-clear to you, there may be a midrange build-up on stage, making it difficult to hear.
Tune the System
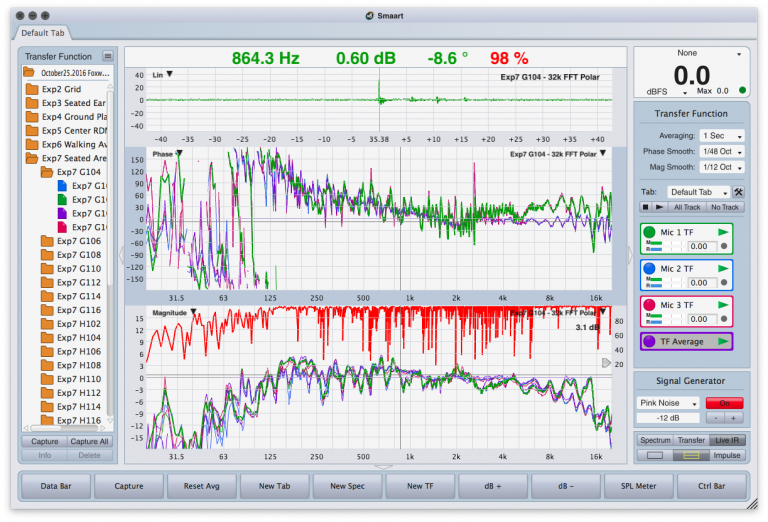
Tuning the room is an integral part of a front of house engineer’s job and using a multi-track recording makes it significantly easier to identify exactly how the room will react to your mix. While at the venue, you can use three microphones to calculate the average frequency response of the room. Placing one mic near the PA system, one at your mix position and one behind you, will deliver a fairly accurate reading of how your mix sounds throughout the room.
• Check to make sure that the mix is routed properly on your console, and then listen in your headphones to confirm that everything sounds correct. Play the mix back through the system and use EQ to sculpt the PA so that the frequency response in the room matches the target trace you created earlier.
• Use analysis software such as SMAART to measure the frequency response of the PA. The transfer function makes it easy to see the difference between what’s coming out of the console and what’s coming out of the PA. Use these measurements to determine what effect the room is having on your mix. For instance, if the graph shows a boost in the low-mids, the room is disproportionately amplifying those frequencies.
• There is no ideal frequency response for a PA system, so everyone’s curve will look a little different. For a rich sound with powerful low-end, tune your PA so the SMAART reading shows the low end peaking around 15 to 18 dB, sloping gently into the midrange. For a brighter, sparkly sound, use a flat frequency response.
Ring Out the Room
After dialling in the mix, try to quickly spend time listening to some music to identify which (if any issues) are caused by the room, or are inherent to the system. This is easy to do by listening at different volumes to see how the room changes, making sure to briefly go to show volume. And quickly muting a system will give you a rough idea of any hanging reverberations too.
If you do experience feedback during your show, stay calm and scan the stage for any visual signs of the problem, like a mic pointed at a stage monitor or flashing console meters. Put your headphones on and start soloing your busses to identify where the issues are coming from. By using the bus structure detailed above, you can save a significant amount of time in these situations since you won’t have to solo each individual input.
Record The Show and Critique Your Mix
The best way to improve your mixes is to critically examine your own work. Capturing a recording of every show you do, even if it’s just a two-track mixdown, allows you to compare your mixes over time and identify areas you can improve.
Plus, by recording every show, you can compare your progress over the run of a tour. Since the performance is the same every night, the only variable is the venue. By comparing these recordings to one another, you can easily see what you contributed to the sound. This gives you a better idea of what it is that you bring to the table and helps build your confidence when adapting to changing environments.
Remember, critically listening to your own work is the only way to get any better.

About the Authors:
Vincent Casamatta has spent the past 18 years mixing front of house for artists including Maroon 5, Halsey, and Prince. He got his start mixing at small clubs in Chicago, where he owned and operated a recording studio in the early 2000s before moving to Los Angeles a decade ago.
Jay Rigby has spent the past 15 years mixing in a variety of settings. After getting his start with a small sound company, he went on to become Head of Audio at Terminal 5 in New York before mixing front of house for major acts like Queens Of The Stone Age, My Chemical Romance, and The 1975.
Subscribe
Published monthly since 1991, our famous AV industry magazine is free for download or pay for print. Subscribers also receive CX News, our free weekly email with the latest industry news and jobs.


