News
10 May 2021
Tech Talk: Your Bulletproof Backpack Livestreaming Setup

Subscribe to CX E-News
Let me set the stage for you; a client you’re doing a basic AV gig for next week has suddenly decided that they want to live stream their presentation to YouTube, and they don’t want to have to pay a fortune for an entire tech team. Of course, they said that their “Nephew does streaming all the time from their bedroom, so it can’t be that hard.”
I’m sure we have all had this story in some shape or form over the years. I want to let you know that in this case, it’s not that far from the truth. Live streaming can be pretty low tech to set up and start. However, doing it right and doing it at a quality that your clients will still be happy paying for is another story.
So in this article, I want to talk about the essential gear you need to run a high-quality backpack live stream that you can quite happily charge clients for and still have them come back for your services.
We will discuss the pros and cons of some off-the-shelf gear and some software that you will need, and then, in conclusion, I will tell you the best setup for a multi-cam stream that your clients will be happy with.
So before we talk about gear, we need to address the three components of the event; the internet connection, encoding, and vision management.
The internet connection
Possibly the most critical and overlooked aspect for your clients and venue will be your internet connection. One of the worst options you have is connecting to the venue’s Wi-Fi. There are a million reasons why this is bad, so I’m just going to say DON’T. Connecting to the venue LAN is ok, but it will be limited in speed at many venues, may have some network restrictions on it, or in the worst case, they will try to charge an exorbitant fee for it
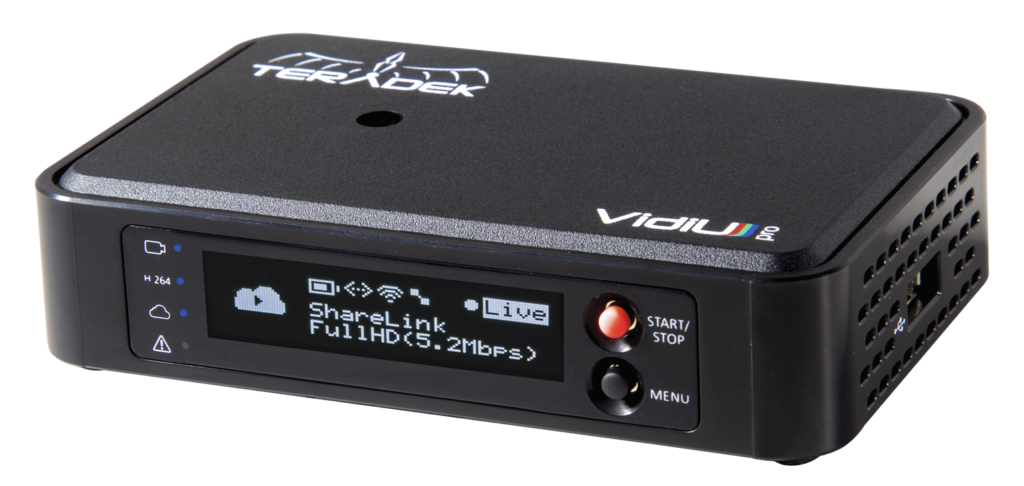
Your best option is to work with an internet bonding service. What that will do is give you some hardware to insert the hotel LAN cable, connect to the hotel Wi-Fi, and insert several mobile SIM cards across multiple different network providers. All those different internet connections get bonded together to give you a super reliable and fast connection, so no matter what happens to one connection, you have all the others to use.
For a professional set up you can look at a service like Terradek cloud, with their Vidu device, that will run you up about $1000 for the hardware. They have a subscription fee for the bonded internet, and as their bonding hardware is also a video encoder, there are benefits to this device over others. Or you can use a cheaper service like Speedify. They don’t have the hardware, but their software will allow you to connect multiple mobile phones, LAN, and Wi-Fi on your laptop. In both cases you will still need to pay for your mobile data, but when the entire production hinges on you being able to output the data, you need to be sure you have this part locked down.

Encoding
Video encoding is the process of preparing a video for output by ensuring it meets encoding and decoding (that’s what CODEC stands for) formats and specifications. This includes converting from one format to another and cleaning up any artifacts that may be leftover during production. During a live stream, you will need to encode the live vision you are getting from your cameras into something that can be sent over the internet to be distributed to the video service.
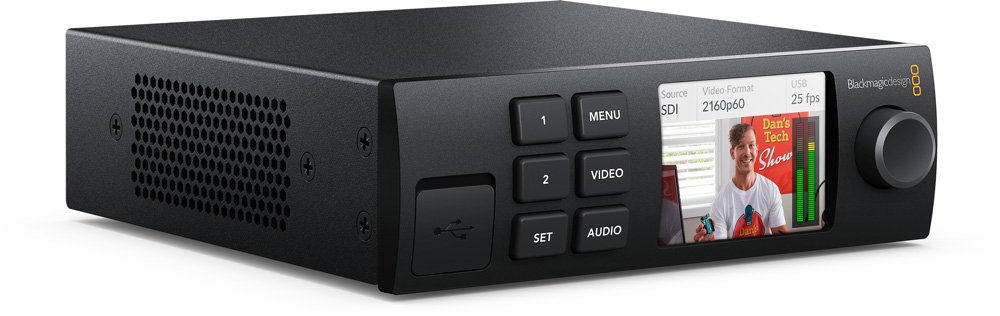
If you’re not using the Terradec Vidu and locked into their encoder/bonding service, then you can look to the Blackmagic products to do your encoding. There are two products from Blackmagic that are excellent options, and it depends on how fancy you want to be with your streaming. If you are going to run a single camera, then I recommend looking at the WebPresenter. The WebPresenter converts your camera output into a virtual webcam that you can put into software. If you have SDI out only on your camera, you will need to get an SDI to HDMI converter as they only take HDMI in, but this is more than enough for live streaming.
If you want to be fancy and want to do multicam, I would recommend using the Blackmagic ATEM mini or ATEM pro. This allows you to have a hardware vision switcher with four HDMI inputs, two audio inputs, and a monitor.
Going the ATEM route is the best option as it solves a few issues that you will have with audio capture if you don’t have audio in on your camera that can pass through to the HDMI. You can use one of the two 3.5 jacks to post in audio.
Vision management
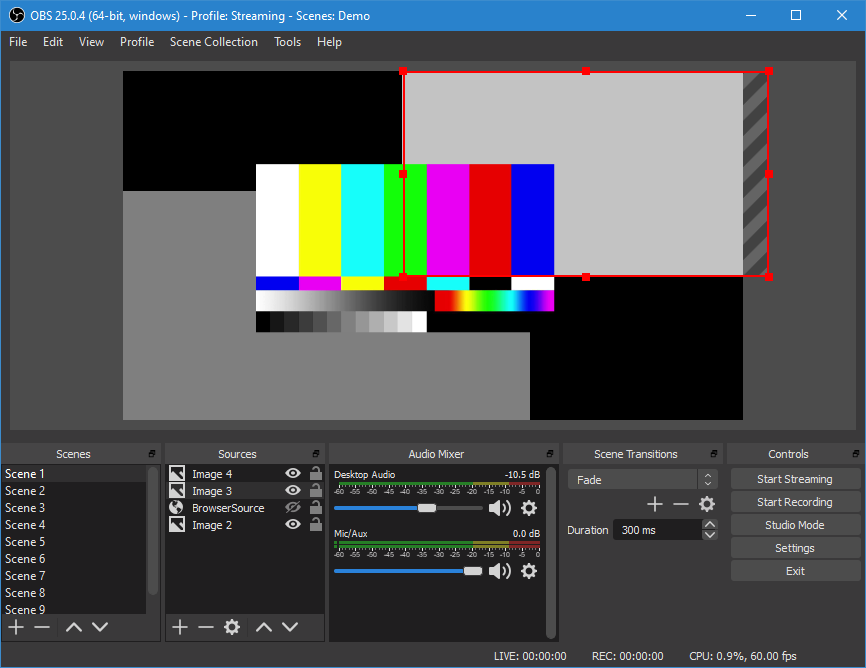
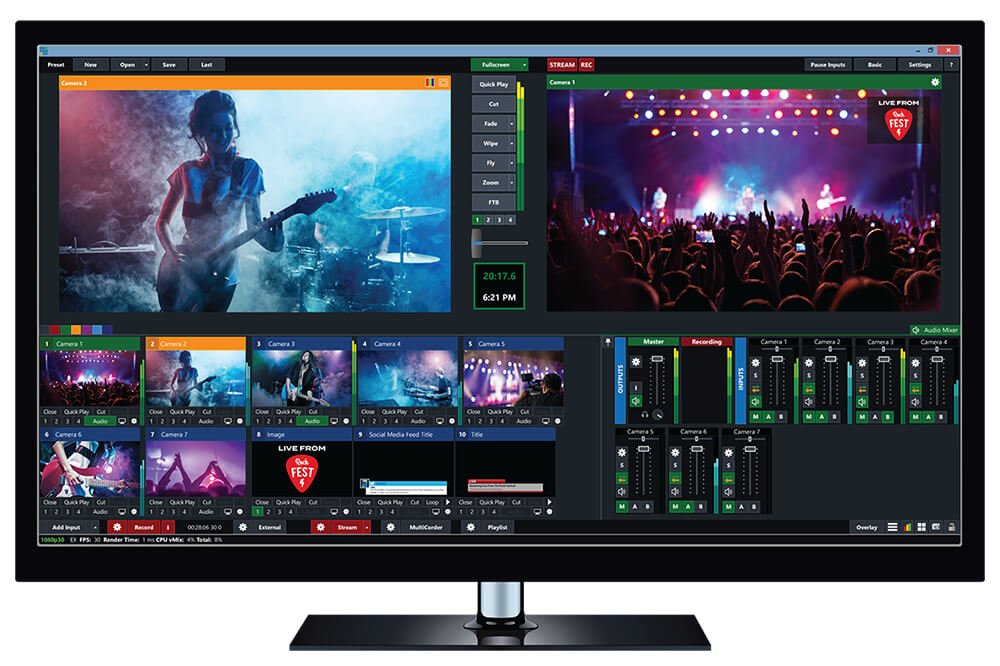
At this point, you have got your camera, audio, and encoder all passing video through to something, but you need now to compile it all into a single data stream that can be sent via the internet to YouTube. The easiest option is to use a laptop with one of three software options; Vmix, OBS, or Streamlabs OBS.
All three options are primarily free but have slightly different functions and skill levels to use. If you want a more robust, well-built, and broadcast-level tool, then go with Vmix. There is a bit of a learning curve, but they have been around for a while and have excellent support and guides online, so it’s worth looking at if you think you will be doing a lot of streaming.
If you want a super simple and functional tool that works, then go for OBS. This software takes what you put in, allows you to do some simple switching, and then send it to a single destination. It’s no-frills but is used by literally thousands of streamers with very few issues, so it’s a great place to start.
Lastly, Streamlabs OBS is a customised version of the vanilla OBS software that allows you to use widgets to enhance video production. It’s used a lot by gaming streamers, so it is skewed that way for what their widgets can do, but if you want to experiment a little to make the production a little more interesting, this may be worth trying.
Each of these software packages has a one-click YouTube connection. Still, they also allow you to stream to another platform such as Bettercast, so regardless of where your client wants you to send the video, you can accommodate them.
In conclusion
I have spoken in brief about how and what you need to consider if you’re going to do a client live stream, but now I’ll talk about how I put a gig together that works, is easy to transport and is very cost-effective in setting up.
The gear list
- Laptop with OBS installed – I have a dual boot computer, so one operating system has only OBS, Chrome, and drivers on it, and no other software. This makes the set up a little more stable. It also means that you will only need to have one single input of the ATEM video and ATEM audio, and you can manage the entire event from there.
- Two cameras with HDMI output – I have Canon EOS100 mk2s on sticks and lock one on the podium and the other locked as a wide shot to the audience for some flavour.
- Radio lapel mic – take the transmitter and have that in an output of the desk, then have your receiver plugged into the ATEM audio input. Doing it like this means that you’re not bound to just the presenter, so if they want to play audio from their computer, you are going to have that on the stream as well.
- ATEM mini – This little hardware unit makes vision mixing so simple. HDMI in two cameras and the passthrough from the presenter’s laptop/ projector (slides). With that, you can do single button PIP of slides, some ok transitions, and you’re consolidating the audio and video into one USB input of your computer.
- Internet bonding – I built a multi-sim bonded internet device using a Raspberry Pi, some USB sim card Wi-Fi devices, and the Speedify app. But you can just as quickly USB two mobile phones to your laptop, then using Speedify as well, bond the hotel Wi-Fi, LAN, and the two mobile phone data plans to ensure you have a decent connection.
That whole setup is pretty easy to make, and you don’t need to use the same cameras as I do, but you can build this entire kit for under $2000 if you shop around. You can be streaming for clients, and it’s going to look slick, sound great and be very easy to manage and maintain.
Subscribe
Published monthly since 1991, our famous AV industry magazine is free for download or pay for print. Subscribers also receive CX News, our free weekly email with the latest industry news and jobs.
Recent posts


Latest jobs